
Terry’s Tails n Trotters

Custom-Made Horse Tail Enhancements and Potbellied Pig Sanctuary
Applying & Caring For Your T-Tail
Caring for your T-Tail is pretty simple. Afterall, you're a busy horse person and you don't have time to fuss with complex maintenance. Treat your T-Tail as you would your horse's natural tail. It is made of 100% genuine horse hair. After use, wash it with gentle shampoo and then make sure to condition it. Your regular horse's tail may be alright without regular conditioning because your horse naturally secretes oil, which moisturizes the hair. However, your T-Tail needs to be conditioned regularly. Any quality conditioner will do but make sure you really rinse it out well! For added luster, you may chose to rub a dab of shine product or detangler in your palms and then gently smooth through the T-Tail prior to storage.Treat your T-Tail as an investment, like you would any other piece of your show
equipment.
Your T-Tail should always be hung up and protected. Super soft Nylon Tail Bags to store your T-Tail (or other brand) are available. Stay away from any tail carrier with a zipper or buckle. The hair strands can get caught and break in those kind of things. You should always hang your T-Tail. Hanging keeps air circulating through the tail and allows any conditioner or moisturizing products like detangler to travel down the entire length of the hair strands. It is best to protect the T-Tail in a tail bag. I recommend and sell soft nylon tail bags. When you're ready to use your T-Tail, take it out of the bag, gently shake it out to remove any debris (like shavings or lint) and then simply finger comb through each section for maximum fullness. If you must brush: • Apply the sections to your horse • Apply detangler (like Cowboy Magic) or spray-on conditioner (like Healthy Hair Care) • And then use a gentle paddle brush. I like the Goody-brand kind with the knobs as part of the bristle - not little knobs stuck on top of the bristle which fall off after the first few uses! Start at the bottom and work your way up to minimize strand loss.Basic Attachment Instructions:
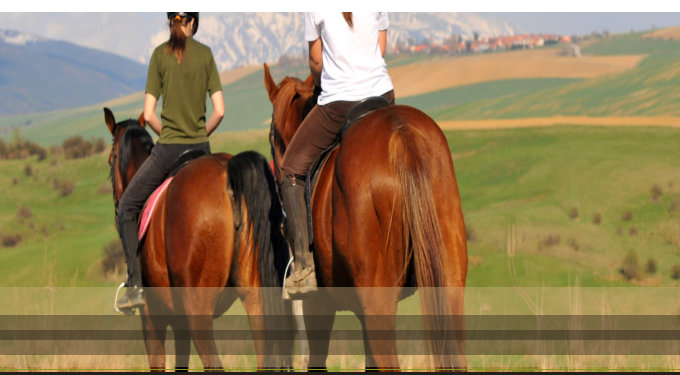
For safety, position yourself standing off to the side of your horse's hindquarters. 1. Each section has a loop at the top (PICTURE). Holding the loop, position the T-Tail section next to your horse's tail bone and determine the desired length. I recommend applying the T-Tail sections so they hang no longer than fetlock length. However, your own preference and your horse's conformation should be your guide. 2. Simply take two small sections of your horse's real tail from the underside, next to the tail bone, and thread them through the loop, creating a loop of real hair through the extension's loop. 3. You can secure the extension with a rubber band (braid binder) on the little bit of your horse's real tail you just looped through. 4. Repeat steps 2-3 to insert as many sections as you need to achieve your desired look. Remember to space the sections out around the tail bone to create the most natural look possible.T-Tail Pro Attachment Tips:
• To make Step #2, above, even easier, use a T-Tail tool. It acts like needle threader to pull the real hair through the loop on the tail piece. (picture) • The material I use to create the loop at the top of every T-Tail section has grip, strength and a little stretch for your horse's comfort. Because of the loop's unique properties, it is almost impossible for a section to fall out while you are exhibiting your horse. (picture) • If your horse's real tail is naturally very thin, or you are applying the T-Tail sections so they are very close to the ground, you may want to "super lock" the extension in place. To "super lock" it, put a few twists of a braid in the little bit of your horse's real tail you just looped through before securing it with the braid binder. • By varying the number and placement of the sections along the horse's natural tailbone, you can achieve various looks. • The current trend is for "blunt cut" style tails, where the tail looks straight and even across the whole bottom. To create a blunt style, all four sections should be attached at about the same height. The blunt style is very popular in the stock-breed rail classes like Hunter Under Saddle and Western Pleasure. In Dressage and A-Circuit Hunters, the blunt style is considered the *only* style. • To create a "tapered look," the two outside sections can be attached slightly higher than the two inner secions. The taper is more desired in young horses and working classes such as Trail because it is viewed as a more natural look.If you have an idea or T-Tail tip, I'd love to hear it!
E-mail it to ttails@mail.com. If I use it on the website, I will certainly note it came from you. I'll even provide a reciprocal website link, if you have one.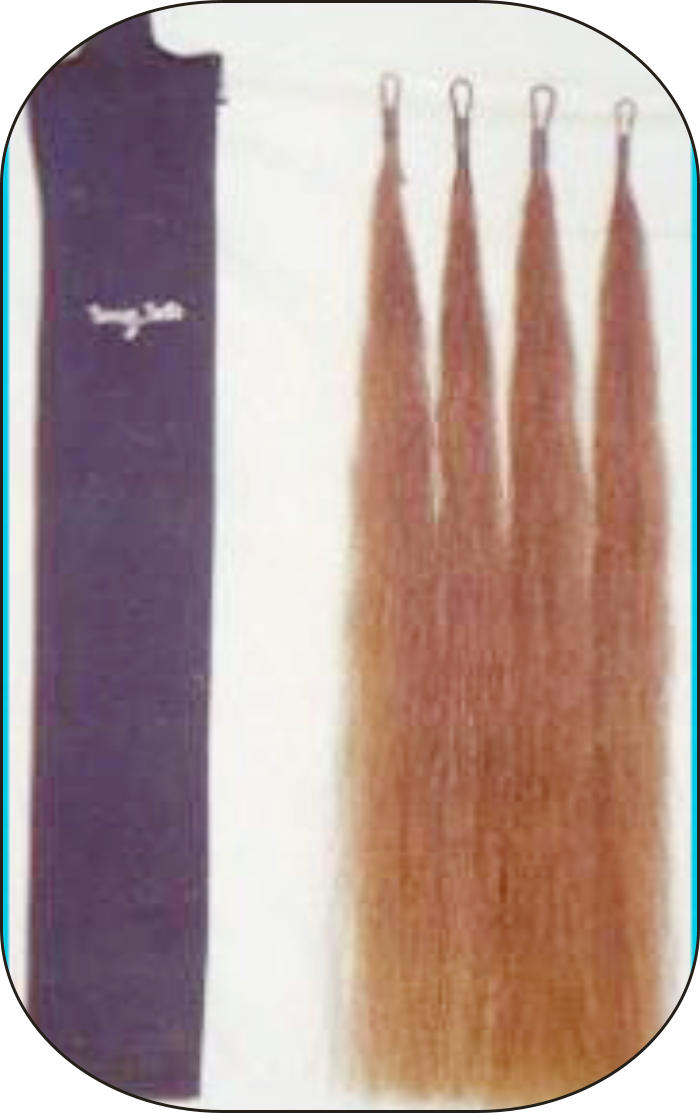

T-Tails Use & Care


Terry’s Tails n Trotters

Custom-Made Horse Tail Enhancements and Potbellied Pig Sanctuary
Applying & Caring For
Your T-Tail
Caring for your T-Tail is pretty simple. Afterall, you're a busy horse person and you don't have time to fuss with complex maintenance. Treat your T-Tail as you would your horse's natural tail. It is made of 100% genuine horse hair. After use, wash it with gentle shampoo and then make sure to condition it. Your regular horse's tail may be alright without regular conditioning because your horse naturally secretes oil, which moisturizes the hair. However, your T-Tail needs to be conditioned regularly. Any quality conditioner will do but make sure you really rinse it out well! For added luster, you may chose to rub a dab of shine product or detangler in your palms and then gently smooth through the T-Tail prior to storage.Treat your T-Tail as an investment, like you would any other piece of
your show equipment.
Your T-Tail should always be hung up and protected. Super soft Nylon Tail Bags to store your T-Tail (or other brand) are available. Stay away from any tail carrier with a zipper or buckle. The hair strands can get caught and break in those kind of things. You should always hang your T-Tail. Hanging keeps air circulating through the tail and allows any conditioner or moisturizing products like detangler to travel down the entire length of the hair strands. It is best to protect the T-Tail in a tail bag. I recommend and sell soft nylon tail bags. When you're ready to use your T-Tail, take it out of the bag, gently shake it out to remove any debris (like shavings or lint) and then simply finger comb through each section for maximum fullness. If you must brush: • Apply the sections to your horse • Apply detangler (like Cowboy Magic) or spray-on conditioner (like Healthy Hair Care) • And then use a gentle paddle brush. I like the Goody-brand kind with the knobs as part of the bristle - not little knobs stuck on top of the bristle which fall off after the first few uses! Start at the bottom and work your way up to minimize strand loss.Basic Attachment Instructions:
For safety, position yourself standing off to the side of your horse's hindquarters. 1. Each section has a loop at the top (PICTURE). Holding the loop, position the T-Tail section next to your horse's tail bone and determine the desired length. I recommend applying the T-Tail sections so they hang no longer than fetlock length. However, your own preference and your horse's conformation should be your guide. 2. Simply take two small sections of your horse's real tail from the underside, next to the tail bone, and thread them through the loop, creating a loop of real hair through the extension's loop. 3. You can secure the extension with a rubber band (braid binder) on the little bit of your horse's real tail you just looped through. 4. Repeat steps 2-3 to insert as many sections as you need to achieve your desired look. Remember to space the sections out around the tail bone to create the most natural look possible.T-Tail Pro Attachment Tips:
• To make Step #2, above, even easier, use a T-Tail tool. It acts like needle threader to pull the real hair through the loop on the tail piece. (picture) • The material I use to create the loop at the top of every T-Tail section has grip, strength and a little stretch for your horse's comfort. Because of the loop's unique properties, it is almost impossible for a section to fall out while you are exhibiting your horse. (picture) • If your horse's real tail is naturally very thin, or you are applying the T-Tail sections so they are very close to the ground, you may want to "super lock" the extension in place. To "super lock" it, put a few twists of a braid in the little bit of your horse's real tail you just looped through before securing it with the braid binder. • By varying the number and placement of the sections along the horse's natural tailbone, you can achieve various looks. • The current trend is for "blunt cut" style tails, where the tail looks straight and even across the whole bottom. To create a blunt style, all four sections should be attached at about the same height. The blunt style is very popular in the stock-breed rail classes like Hunter Under Saddle and Western Pleasure. In Dressage and A-Circuit Hunters, the blunt style is considered the *only* style. • To create a "tapered look," the two outside sections can be attached slightly higher than the two inner secions. The taper is more desired in young horses and working classes such as Trail because it is viewed as a more natural look.If you have an idea or T-Tail tip, I'd love to hear it!
E-mail it to ttails@mail.com. If I use it on the website, I will certainly note it came from you. I'll even provide a reciprocal website link, if you have one.


T-Tails Use & Care


Terry’s Tails n Trotters
Custom-Made Horse Tail Enhancements
and Potbellied Pig Sanctuary
Applying &
Caring For
Your T-Tail
Caring for your T-Tail is pretty simple. Afterall, you're a busy horse person and you don't have time to fuss with complex maintenance. Treat your T-Tail as you would your horse's natural tail. It is made of 100% genuine horse hair. After use, wash it with gentle shampoo and then make sure to condition it. Your regular horse's tail may be alright without regular conditioning because your horse naturally secretes oil, which moisturizes the hair. However, your T-Tail needs to be conditioned regularly. Any quality conditioner will do but make sure you really rinse it out well! For added luster, you may chose to rub a dab of shine product or detangler in your palms and then gently smooth through the T-Tail prior to storage.Treat your T-Tail as an investment, like you would
any other piece of your show equipment.
Your T-Tail should always be hung up and protected. Super soft Nylon Tail Bags to store your T-Tail (or other brand) are available. Stay away from any tail carrier with a zipper or buckle. The hair strands can get caught and break in those kind of things. You should always hang your T-Tail. Hanging keeps air circulating through the tail and allows any conditioner or moisturizing products like detangler to travel down the entire length of the hair strands. It is best to protect the T-Tail in a tail bag. I recommend and sell soft nylon tail bags. When you're ready to use your T-Tail, take it out of the bag, gently shake it out to remove any debris (like shavings or lint) and then simply finger comb through each section for maximum fullness. If you must brush: • Apply the sections to your horse • Apply detangler (like Cowboy Magic) or spray-on conditioner (like Healthy Hair Care) • And then use a gentle paddle brush. I like the Goody-brand kind with the knobs as part of the bristle - not little knobs stuck on top of the bristle which fall off after the first few uses! Start at the bottom and work your way up to minimize strand loss.Basic Attachment Instructions:
For safety, position yourself standing off to the side of your horse's hindquarters. 1. Each section has a loop at the top (PICTURE). Holding the loop, position the T-Tail section next to your horse's tail bone and determine the desired length. I recommend applying the T-Tail sections so they hang no longer than fetlock length. However, your own preference and your horse's conformation should be your guide. 2. Simply take two small sections of your horse's real tail from the underside, next to the tail bone, and thread them through the loop, creating a loop of real hair through the extension's loop. 3. You can secure the extension with a rubber band (braid binder) on the little bit of your horse's real tail you just looped through. 4. Repeat steps 2-3 to insert as many sections as you need to achieve your desired look. Remember to space the sections out around the tail bone to create the most natural look possible.T-Tail Pro Attachment Tips:
• To make Step #2, above, even easier, use a T-Tail tool. It acts like needle threader to pull the real hair through the loop on the tail piece. (picture) • The material I use to create the loop at the top of every T-Tail section has grip, strength and a little stretch for your horse's comfort. Because of the loop's unique properties, it is almost impossible for a section to fall out while you are exhibiting your horse. (picture) • If your horse's real tail is naturally very thin, or you are applying the T-Tail sections so they are very close to the ground, you may want to "super lock" the extension in place. To "super lock" it, put a few twists of a braid in the little bit of your horse's real tail you just looped through before securing it with the braid binder. • By varying the number and placement of the sections along the horse's natural tailbone, you can achieve various looks. • The current trend is for "blunt cut" style tails, where the tail looks straight and even across the whole bottom. To create a blunt style, all four sections should be attached at about the same height. The blunt style is very popular in the stock-breed rail classes like Hunter Under Saddle and Western Pleasure. In Dressage and A- Circuit Hunters, the blunt style is considered the *only* style. • To create a "tapered look," the two outside sections can be attached slightly higher than the two inner secions. The taper is more desired in young horses and working classes such as Trail because it is viewed as a more natural look.If you have an idea or T-Tail tip, I'd love to hear it!
E-mail it to ttails@mail.com. If I use it on the website, I will certainly note it came from you. I'll even provide a reciprocal website link, if you have one.